BuddyGroups Tutorial 1: Contact Groups
OBJECTIVE: Learn how to organize and manage contact groups
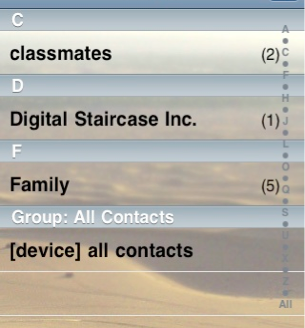
Notice the scrollable list in the middle of the screen (shown below). This list will display all contact groups currently stored in Buddy Groups. Tapping on a group name will show you all the members in the contact group.
Step 1: Understanding Contact Groups
Contact Groups are collections of contacts from your iPhone/iPod’s address book. Buddy Groups makes it easy to define these contact groups so that you do not need to keep searching for the same people when emailing, trading contact information, sharing photos, etc.
When you launch Buddy Groups, you should see the starting “Groups” screen (shown below).
Note: If this is your first time using Buddy Groups, or if you have bookmarked a contact group (a feature described in a later tutorial), you may be brought to a different screen initially. The top-left “Groups” button will navigate back to the main (Groups) screen.
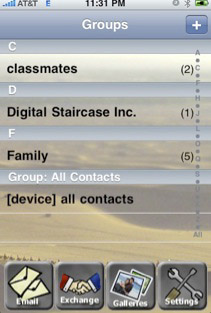
In this example (above), there are 4 contact groups: “classmates,” “Digital Staircase Inc.,” “Family,” and “[device] all contacts.”
The last group (“[device] all contacts”) is a special group and cannot be deleted. It contains all contacts in your iPhone/iPod’s address book. Tap on this group to view a single individual’s contact information.
The other groups are Buddy Groups Contact Groups (BG Groups). These groups contain a subset of contacts and may be created, deleted, or modified without affecting data in your iPhone/iPod’s address book. Only specific information changed for a particular individual (e.g., phone number, email, address) will be saved to the iPhone/iPod’s address book. Group information is only available in Buddy Groups.
Note: The number to the right of the group name indicates the number of members in a particular group. For instance, in the example above, “classmates” has two group members.
Step 2: Create A Contact Group
Tap on the “+” button in the upper right corner of the screen (the button to the right of the “Groups” title). A new screen should appear:
First, you will need to name your new group. To do this, tap on the text field at the top of the screen (where “Enter group name here” is visible). A keyboard will appear. Type in your new group’s name:

Once you have entered your new group’s name, tap on the “Done” button in the bottom right. You are now ready to start adding people to your group.
The top half of the screen shows all current members of your group. Since we are creating a new group, no one is listed right now.
The bottom half of the screen shows a list of all contacts in your iPhone/iPod’s address book. Any of these contacts may be added to your BG Group.
To add someone, simply click on the green “+” button next to the person’s name, whom you wish to add to your contact group.

In the example above, we tapped on the “+” sign next to “Sandstorm Bold.” Notice how the name now appears in our “Group Members” list. Keep adding people to your group until you are satisfied!
Note: There may be too many group members or address book contacts to fit on screen. To view more group members, tap and hold on the group list. Then drag your finger as you would when viewing tables in any other iPhone/iPod application. The same applies for the address book list at the bottom half of the screen.
If you need to add a new contact to your iPhone/iPod address book, tap on the button to the right of “Address Book (All Contacts)”:

That’s all you need to do to define a contact group! If you now go back to the start page (press the “Groups” button in the upper left corner of the screen), you will see your new group in the list.
There are many things you can do with your contact group: email, share business cards, trade via WIFI or Bluetooth, etc. All of these features will be described in the Buddy Groups Tutorials to follow.
For now, let’s learn about all the email options that exist in Buddy Groups.